I need bottoms desperately (really I just need clothes.) I can suffer through RTW tops, but that is not the case with pants. Skirts can be an issue too, but more about that later. In the meantime, I've become obsessed with skirts. I even bought a
book to help me figure out how to line an A-line skirt.

I was ready to conquer
V8882 with gusto: I traced the pattern. I added 1" to the side seam allowances and my usual 2.75" length to the CB for my high and round rear. (This is why RTW skirts can be scary.) Side note: what I have been calling a sway back issue may actually be my high and round rump. Not sure yet if it's just my rear or if I really have a sway back.
I moved on to the muslin. I now see my tilted waist in action! I raised the back 1" and lowered the front 1" (people, I'm on a roll!) By pinning, I was able to fix the hemline curve. I still needed the 2.75" at the CB, I just can't seem to draw the curve correctly on paper. I draw half the curve, fold the pattern in half and then trace it on the other side.
 |
| Not a great shot |
I was ready to cut some fabric. Dang! The piece I wanted to use was too short. My alts required an extra 3/4 yard. See how the Lord helps fools and babies? I was completely willing to ignore the pulling around my high hip and what the pleat was doing as it opened over the ummm ... apex of my bum. Also, that 2.25" waistband looked like it was sitting directly under the girls. I definitely had an old man in Florida look.
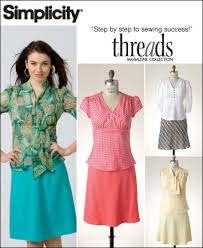
The desire for a quick win was so great, I decided to move on to an easier bias skirt with an elastic waist (that didn't need as much fabric.) Enter
S2614. How the hell do you line a skirt with an elastic waist? (Lining is a requirement for me.) Thank God for
Google.

In my brilliance, I did the tissue alts in the following order: Overall length, CB hem length, hips, high hip, back waist (notice how I forgot the front waist?) The high hip alt was torturous. I tried to use the seam method. Completely severed the tissue on both the front and back. Still wasn't sure if I really got the alt right, but I moved on to the muslin.
Yep. Still needed to lower the front waist. Here is where I am amazingly awesome. I still don't know why, but although I marked the new waistline on the muslin, I chose to use a curve to draw a different waistline. The CF was the same, but I angled it differently. I started with the left side. I couldn't quite get ruler to match up on the right side. So I cut the left side, folded the skirt in half and cut the right side based on the left! YES!! I CUT OFF THE LENGTH I ADDED FOR THE RIGHT HIGH HIP. I am greatness and excellence rolled up into one. Luckily, I saved the piece I cut off.
My hemline curve wasn't right on this skirt either.
This weekend will be spent working on both skirts ... Of course, none of the fabric in my stash will do now ;-) I have my heart set on the Potent Purple linen from Jo-Ann. I could probably go for Calla Green as an alt. (Yes, I have a 5+ yd piece here, but that's for a dress!)


Third choice is potting soil.

I see a top in my future with this fabric.


